Raiden Shogun: Optimal Rotations and Gameplay Guide
Raiden Shogun is one of the strongest and most versatile characters in Genshin Impact thanks to her powerful Elemental Burst and team-wide Energy regeneration. She excels in teams that rely on frequent Burst rotations, enabling consistent damage cycles and allowing energy-hungry characters to perform at maximum efficiency. Mastering her rotation patterns is essential for unlocking her full potential as both a support and a high-output Burst DPS.
Core Mechanics of Raiden Shogun
Raiden’s kit revolves around Resolve stacks and Energy Recharge scaling. Her Elemental Skill provides off-field Electro application, generates energy and increases Burst damage of the entire team. Her Burst transforms her into a powerful field unit, dealing Electro-infused attacks that scale with her Energy Recharge.

The goal of every rotation is to build Resolve stacks, use teammates’ Bursts and then unleash Raiden’s own Burst at maximum efficiency. Proper sequencing ensures both high personal DPS and strong support value.
Standard Burst Support Rotation
This rotation is ideal for teams focused on strong Elemental Bursts:
- Use Raiden’s Skill early to activate Eye of Stormy Judgment.
- Switch to teammates and use all available Bursts to build Resolve.
- Finish with Raiden’s Burst to recharge the entire team.
This ensures smooth rotations, stable energy supply and strong Electro application throughout the fight.
Optimal DPS Rotation for Raiden
For maximum personal damage, Raiden should enter Burst form with full Resolve stacks and high Energy Recharge. After activating her Burst, she performs a full combo of infused Normal Attacks, taking advantage of her Electro damage scaling and built-up Resolve. Maintaining uninterrupted field time during her Burst is crucial to maximizing total DPS.

Energy Recharge and Build Priorities
Energy Recharge is Raiden’s most valuable stat. High ER boosts her personal Burst damage and strengthens her ability to restore energy for the team. Most builds aim for 250–300% ER depending on weapon and team setup. Attack, Crit Rate and Crit Damage follow as secondary priorities to convert Energy Recharge into stronger overall output.
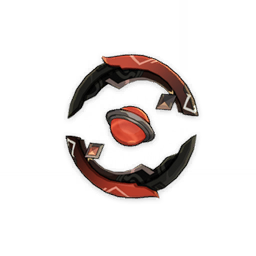
A 4-piece Emblem of Severed Fate artifact set further enhances Burst damage based on Raiden’s ER, making it the optimal choice for nearly all builds.
Team Synergies
Raiden performs exceptionally well in teams that require frequent Bursts:
- Raiden National Teams — stable rotations, high AoE and sustained damage.
- Hypercarry Raiden — supported by Bennett, Kazuha or Kujou Sara for massive multipliers.
- Quickbloom teams — Raiden triggers fast Electro application for Dendro reactions.
Her universal energy restoration allows teams to run Burst-reliant characters with fewer Energy Recharge requirements, increasing overall flexibility.
Advanced Rotation Tips
Try to align all teammates’ Bursts so that Raiden can absorb the maximum number of Resolve stacks. Avoid using her Skill right before swapping into Burst form to prevent losing Resolve buildup. Raiden’s Burst snapshotting ensures that buffs active at the moment of casting carry through the entire duration, so apply offensive buffs before activating it.
Conclusion
Raiden Shogun’s strength lies in her ability to unify a team’s rotation through energy regeneration, Burst enhancement and consistent Electro damage. With proper optimization of Energy Recharge, Resolve stacking and timed bursts, she becomes one of the most reliable and high-impact characters in the game. Mastering her rotations ensures stable, explosive combat performance across all content.
